When you hit the exercise trail, it’s important that you can look back at the progress that you’ve made. Knowing your starting point and being able to see how far you’ve come and what you’ve achieved will keep you motivated to keep on going.
There are times for all of us when we think that we’re stuck in a rut or haven’t achieved anything. It’s then that your photos, body measurements and fit tests matter the most.
Write It Down. Every Time
On a daily basis, you need to be keeping a workout diary. Every time you exercise, make a note of how much you did, how far you ran, or how many reps and weights you did of each exercise.
There are plenty of apps out there to help you now and I’ll do a run down of them in a future article.
If you don’t know how much you lifted last week, and for how many reps, then how are you going to beat it this week? After a while, you’ll be scratching your head, guessing your goals and starting to stagnate.
You. Need. To. Write. It. Down.
Get The Photos, Get The Measurements, But You Need More…
Most of the time, body measurements and photos are a great way to start.
However, your measure of success goes beyond the muscular changes that you’ll see taking place across your body. Sometimes your progress needs to be captured in a different way.
Charting Your Fitness Progress
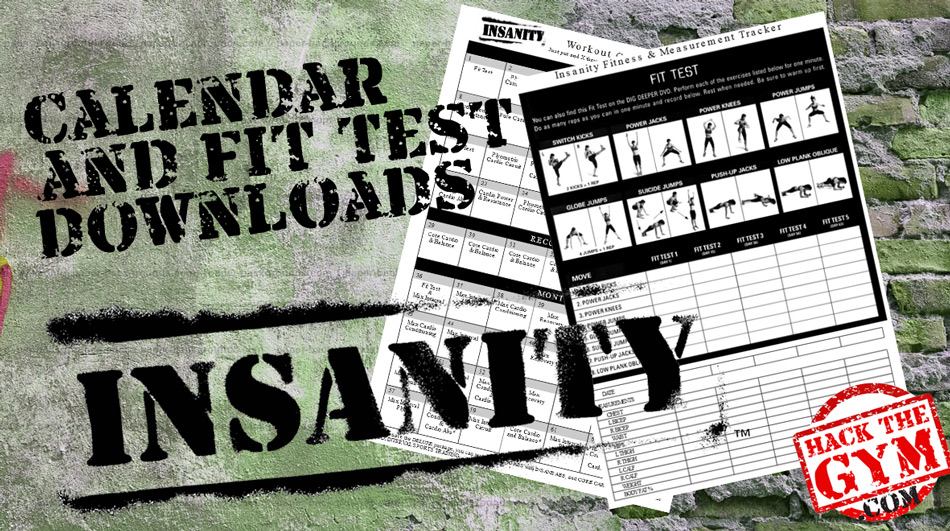
One of the best ways to track your fitness improvements is to repeat a set of exercises every 6 weeks and record how many reps you can do in a fixed amount of time.
Do the following set of exercises at home and write down how many reps you did. This is your base level to compare with.
If you don’t have this base level you have no way of seeing how much your fitness improves in the future.
You will need:
- Stopwatch (there’s probably one on your phone)
- Small towel (you’re going to sweat)
- Big glass of water (you’re going to get thirsty)
Complete one round of the following routine, doing as many of each exercise as fast as you can for 60 seconds, then resting for 30 seconds, writing your reps down, before diving in to the next exercise.
It’s important you stick to your exercise and rest times exactly, so you can measure like with like later on.
Before launching into this, do a light warm up, perhaps some jogging on the spot and arm circles or 5 minutes of skipping.
This entire routine is going to take you less than 10 minutes, so dig in and go for it. If you’re a newcomer to exercise, don’t overdo it, go at your own pace.
It will be worth it.
Exercise 1. Squats
Cross your arms and place your hands on your shoulders, feet shoulder width apart. Lower yourself down to a parallel squat (front of your thighs parallel with the ground) keeping your chest and shoulders upright and your back straight. Stand up again, keeping your back straight. That’s one rep. Keep going for 60 seconds.
Write it down, rest 30 seconds, then into:
Exercise 2. Press-ups
Get into a high plank position forming a straight line with your body from your ankles to your shoulders, placing your hands directly under your shoulders with your arms straight. Don’t stick your bum in the air or let your lower back sag. Make sure you perform a controlled push up using the full range of motion. You can do these on your knees at first if you need to. Keep going for 60 seconds.
Write it down, rest 30 seconds, then into:
Exercise 3. Switch Kicks
Two kicks equal one rep. In a standing position, each leg is kicked out in front of you in turn, aiming to get your foot to waist level. Jump from leg to leg, so you never have both feet on the floor at any one time. Keep going for 60 seconds.
Write it down, rest 30 seconds, then into:
Exercise 4. Power Knees
Start with your hands together, arms out in front of you and your palms facing you. Your left leg should be behind you. Now raise your left leg as you lower your hands and touch your hands to your knee at waist level in front of you. Return to the starting position. Don’t switch legs, do the full 60 seconds with your left leg.
Write it down, rest 30 seconds, then into:
Exercise 5. Tricep Dips
Holding a sturdy chair or a bench behind you with your legs bent and arms straight, dip down until your elbows are bent at a 90 degree angle, then raise your body back up. Keep going for 60 seconds.
Write it down, rest 30 seconds, then into:
Exercise 6. Low Plank Oblique
Get into a plank position with your elbows on the floor and hands clasped. You may want to put a towel under your elbows to stop them rubbing on the carpet. Then bring your left leg forward and to the side, bending your knee. Return to the starting position and repeat with your right leg. This exercise will completely blitz your obliques and stomach muscles. Keep going for 60 seconds.
There, you’re done!
And remember, write it all down.
Now keep hold of your scores and do this again in another 6 weeks to check your improvement.
Everything that follows this moment is all part of the ‘after’ and you’ve propelled yourself forward to become a fitter, stronger you. Congratulations!
